Metal Roof Installation Process – Step-By-Step Guide
Proper installation is crucial for the long-term performance of your roof. Here’s your step-by-step installation guide to help you successfully assemble a metal roof on your home.
Step 1: Tearing off and Removal of Old Roofing Materials
Before installing a new metal roof, it is crucial to tear off the old roofing materials. This step allows for a thorough inspection of any damage to the decking and ensures proper installation.
Additionally, removing old shingles, flashing, and underlayment, and inspecting and repairing any damage to the roof sheathing before moving forward is essential to ensure the new metal roof is installed on a solid, stable foundation.
This step also allows for any potential issues to be addressed before the new roof is installed, preventing future problems and ensuring the longevity of the metal roof.
Step 2: Installation Of Lock Strips & Drip Edge
To install lock strips and drip edge for your metal roof, you will first need to nail 1 1/4-inch galvanized roofing nails into the sheathing about every 16 inches. Then, overlap multiple runs of drip edge by 1/4 to 1/2 inch.
After that, add sealant tape along the top of the drip edge and place an inside closure strip on top of the tape to complete the installation.
Step 3: Installtion Of Underlayment
Before installing a metal roof, it is important to lay down underlayment or ice and water shield to protect the roof decking from water damage. Typically, roofing felt or synthetic underlayment is used for this purpose. The underlayment serves as a waterproof barrier and helps to protect the roof decking from any water that may get underneath the metal panels.
For DIY metal roofing projects, it is recommended to use synthetic underlayment, as it is lightweight, easy to handle, and more resistant to tears and punctures. This makes it easier for homeowners to install the underlayment themselves, without the need for professional assistance. Using a suitable underlayment is crucial in ensuring the long-term durability and waterproofing of a metal roof.
Step 4: Installation Of The Metal Panels
To start installing the metal sheets, ensure that the edging of the roof panels overlaps by 1/2 to 3/4 of an inch and is square to the roof line. Follow the manufacturer’s guidelines for screw placement and start at the eaves, working your way up to the ridge. Use silicone sealant on the underside of the short edge of the next panel to create a watertight seal.
Step 5: Installtion of Flashing Between Panels at the Ridge
To install flashing between the panels at the ridge of your metal roof, you will need to bend a piece of metal into a Z shape that is slightly taller than the ribs of the metal seams on the roof. This will prevent water from getting under the panels and the ridge cap, ensuring a watertight seal.
Use panel bending tools to shape the Z bar flashing accordingly, ensuring it fills in the gap and provides the necessary protection against the elements.
Step 6: Installation of Ridge Cap
To install the ridge cap on your metal roof, start by centering it evenly on each side of the roof. Mark the panel where the ridge cap will sit and then run a strip of sealant tape along the ridge. Make sure to use the appropriate closure strip, whether solid or vented, based on the design of your roof. Finally, install the ridge cap per the manufacturer’s instructions to ensure a secure and watertight finish.


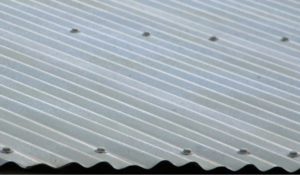
 Through-fastened, or corrugated panels are the most traditional
  Modular panels are another option for metal
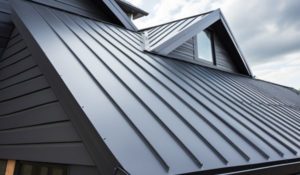
  Finally, standing-


